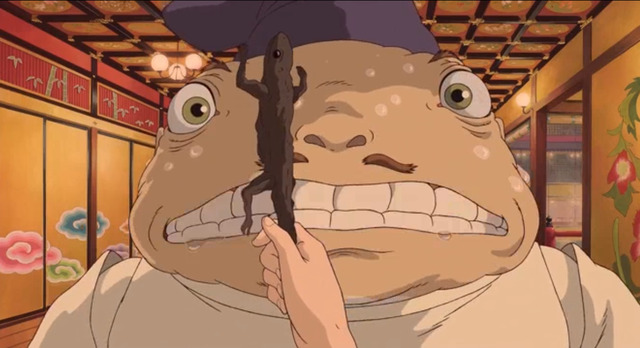
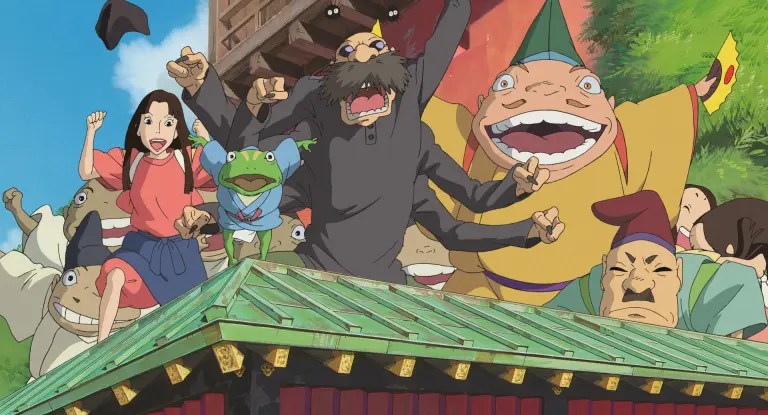
Helllooo!!! Today I am SOOO excited to share probably the best Halloween costume I will EVER make: Kamaji and Rin from Spirited Away!! Spirited Away is one of my all-time favorite movies but I knew I didn’t want to be a basic B and just do Chihiro and Haku. I have zero interest in that. My favorite character, Rin, came to mind and then it hit me like a train…Rin and KAMAJI!! How freakin’ COOL would that be?!
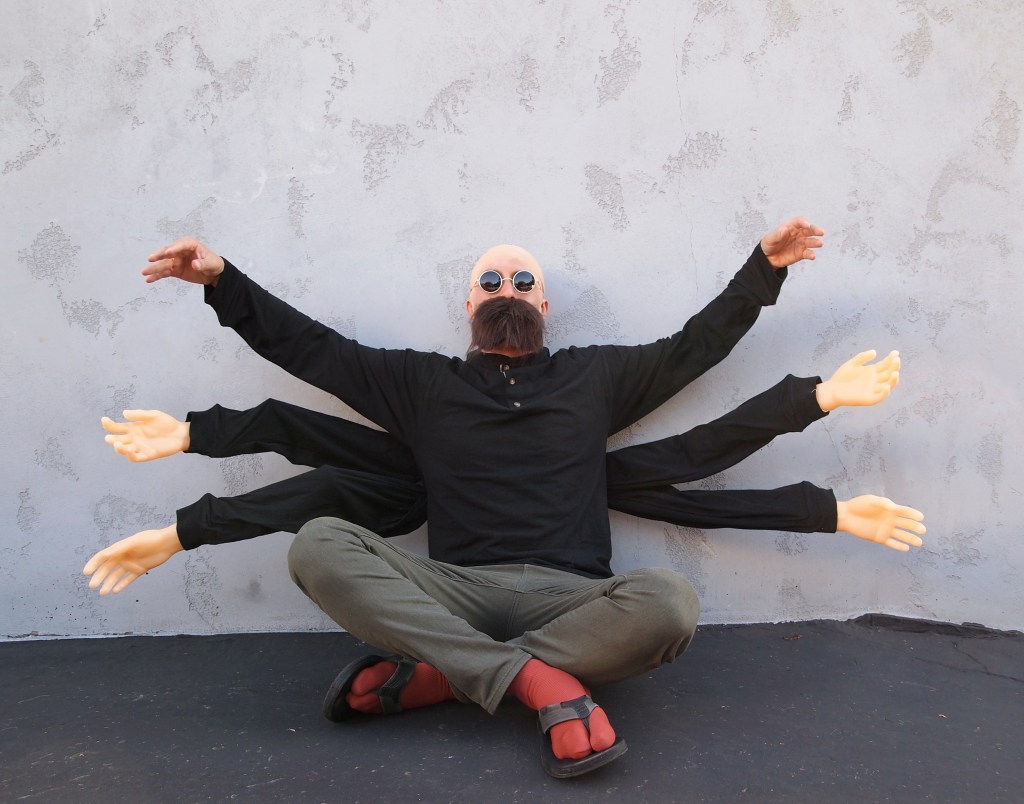
But how could I create a Kamaji?? An 8-limbed spider creature?? I had an idea…but I was very doubtful it would actually work or that the Macgeyver-Martha Stewart in me could pull it off. And though we completely winged it, it luckily turned out pretty decent!! One of the few times where the vision I had in my mind actually translated well into reality LOL. Moral of the story: Just go for it! You never know how it’ll turn out~
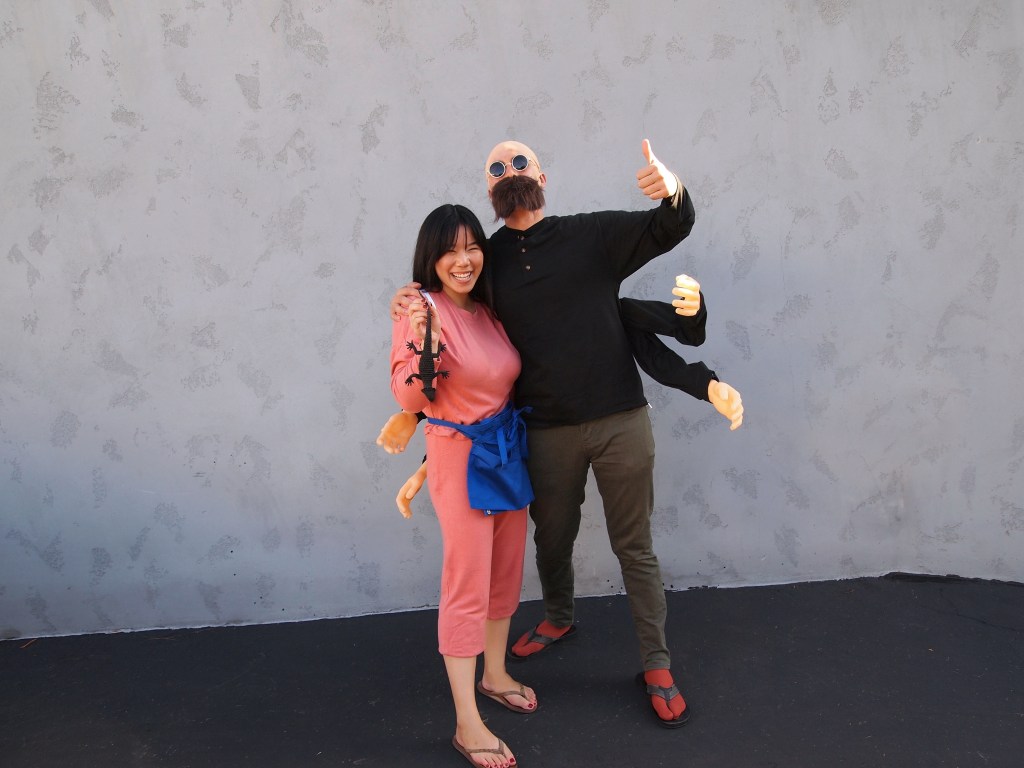
Name a more iconic duo. I’ll wait.
So here’s how we did it!

If you want to see our other Studio Ghibli costumes/cosplay, check out these links!:
– Kiki + Tombo from Kiki’s Delivery Service
– Ponyo + Sosuke from Ponyo
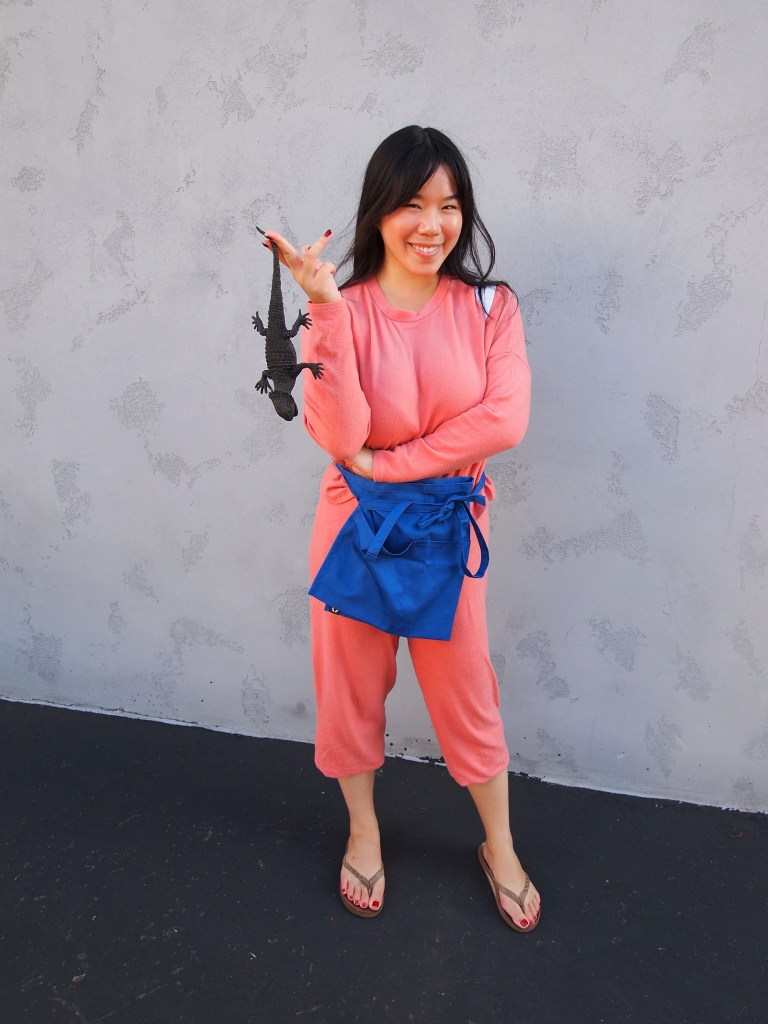
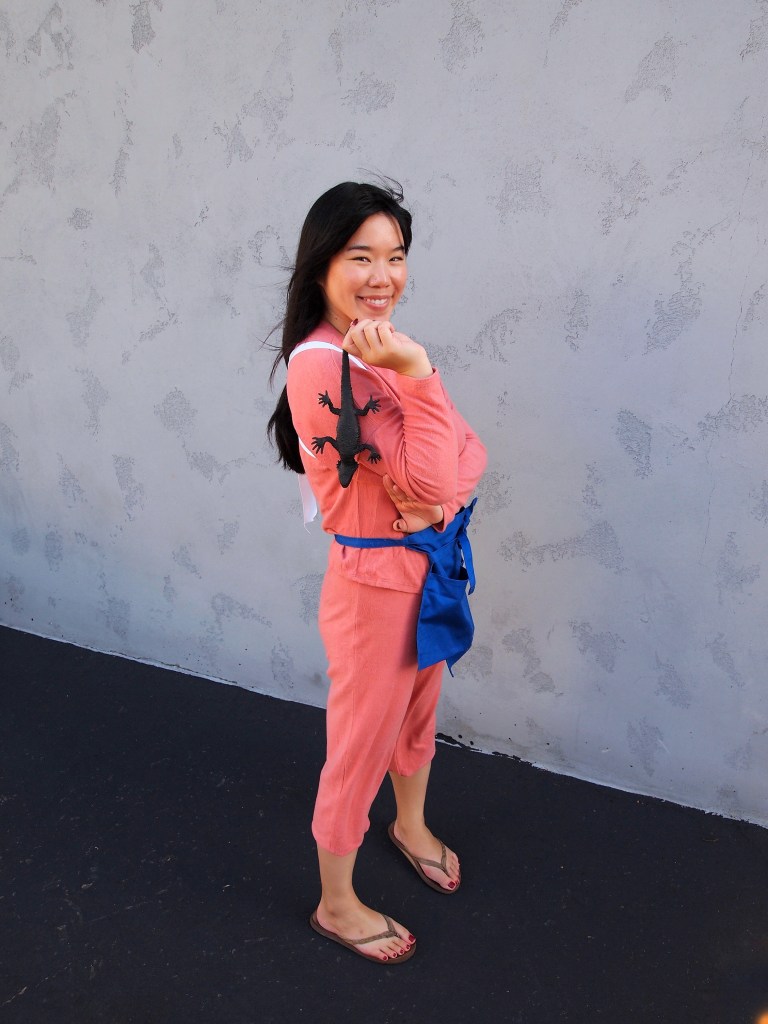
Rin
I loveeee Rin. She’s so cool and doesn’t give a f. And I luckily had just gotten bangs the month before (total coincidence!), so it worked out PERFECTLY!!! It was meant to be~
Rin’s costume is SUPER easy. This is all you need (sharing exact links too!):

+ Matching Salmon/Coral Long-Sleeve Lounge Set – this is the exact one I got because it was theeeee most perfect color and style, there couldn’t have been a better one to get!
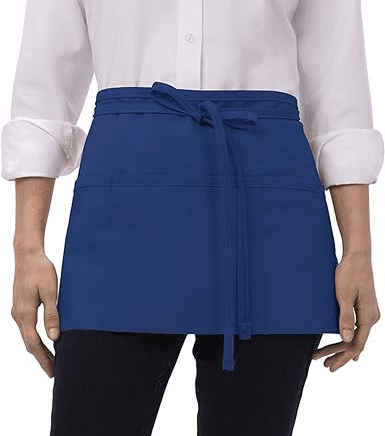
+ Blue Half Apron – a waist apron (not a full one) and then folded it in half on itself so that it looked more narrow
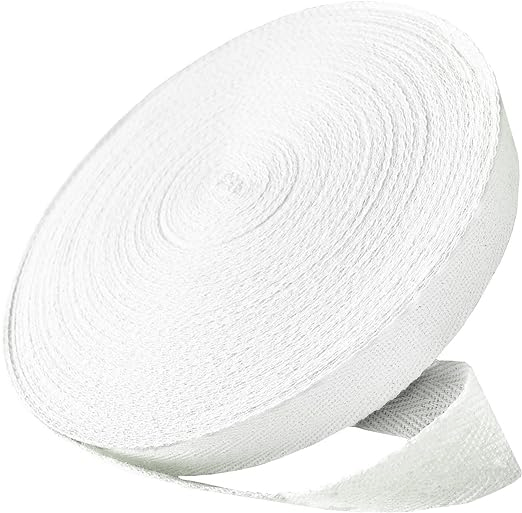
+ White Rope – tie this criss-crossed around your shoulders in a infinity loop with a bow in the middle, if that makes sense
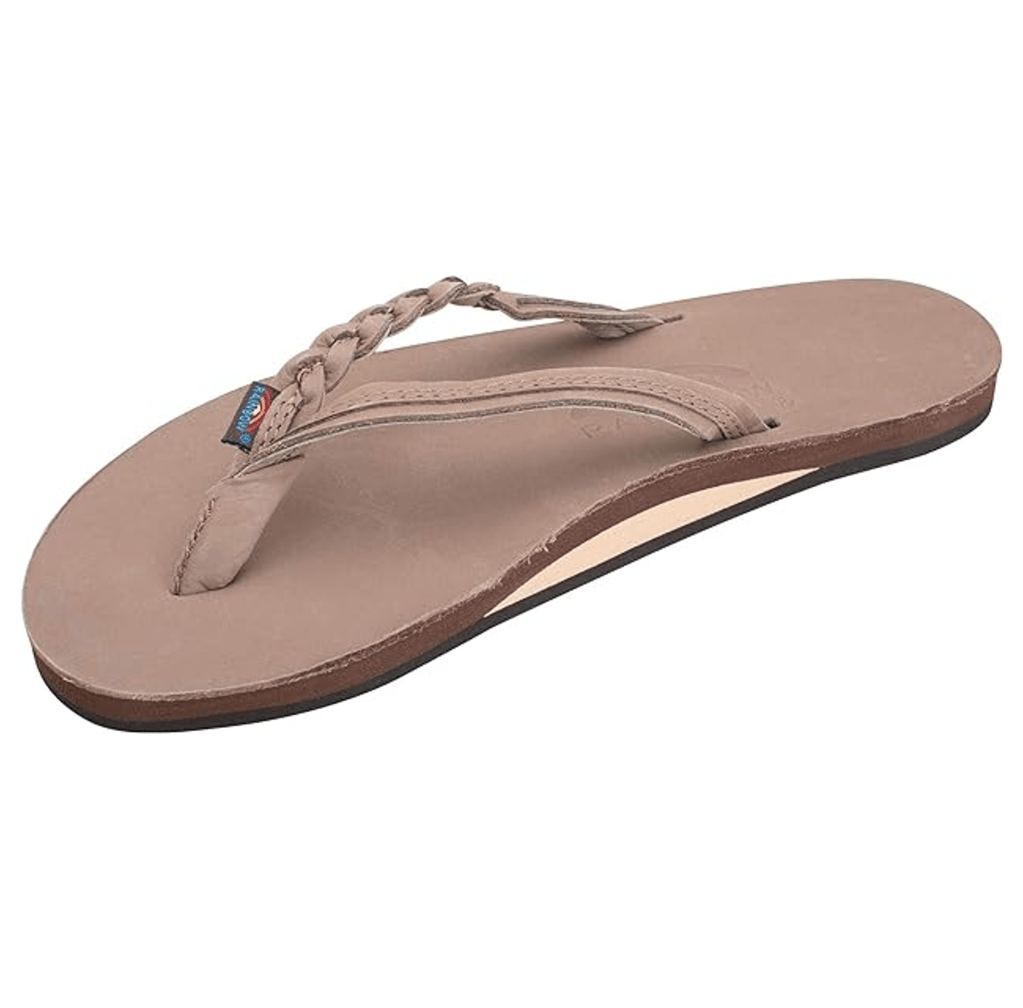
+ Flip Flops – my rainbows never let me down!
+ Wear your hair preferably long with bangs, split down the middle, and then tied together at the very bottom in the back. Tug your hair a little bit near the hairtie so it looks fluffy/bunched
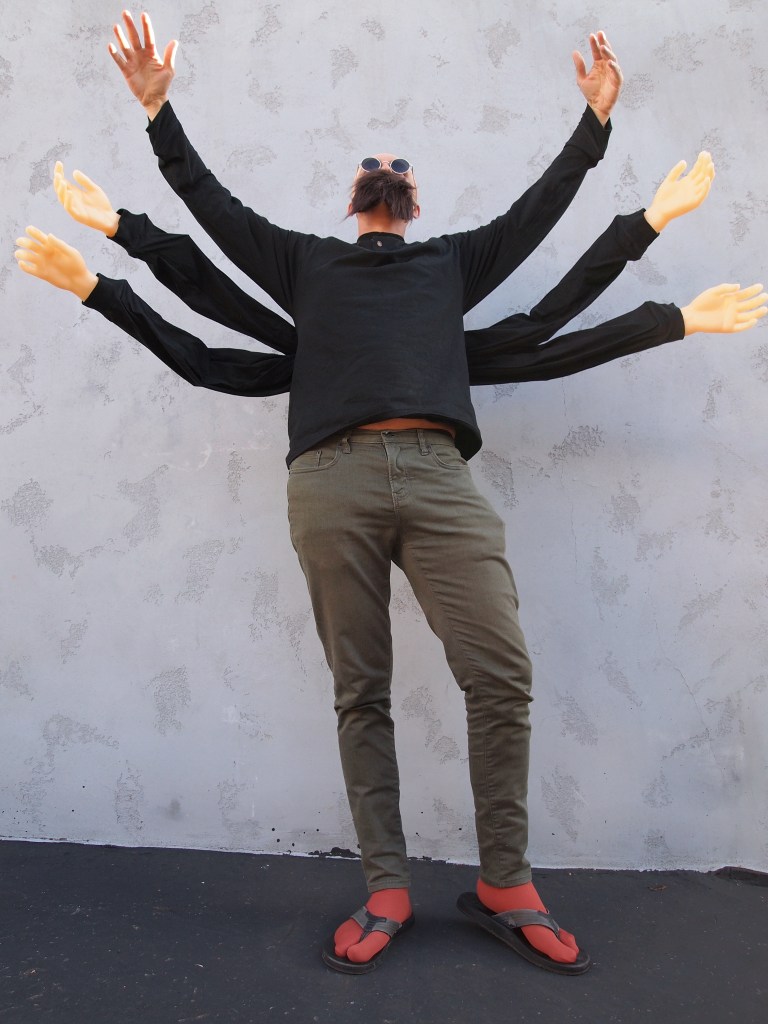
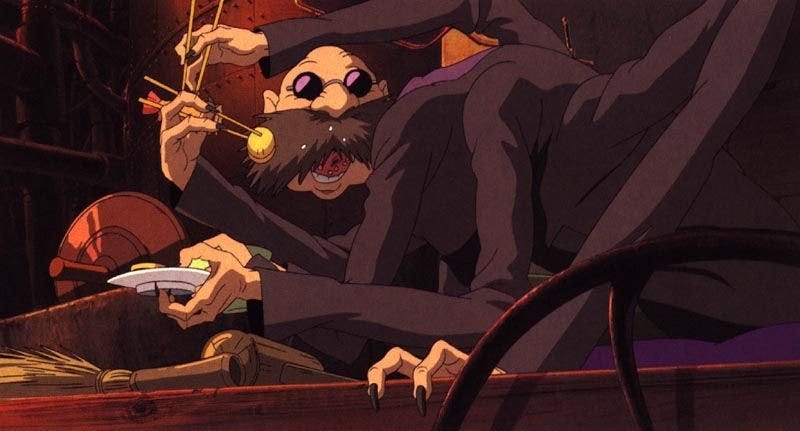
Kamaji
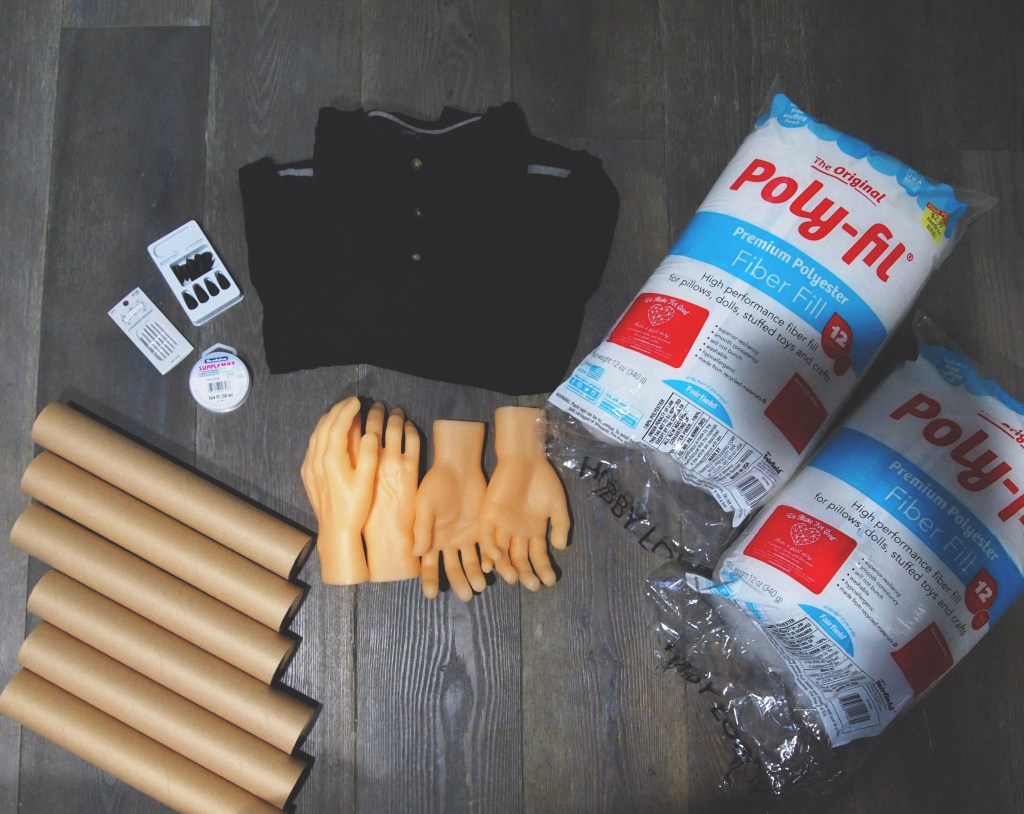
And then here are all of the things you’ll need to bring to life Kamaji! These are exact links and I got most everything from Amazon~
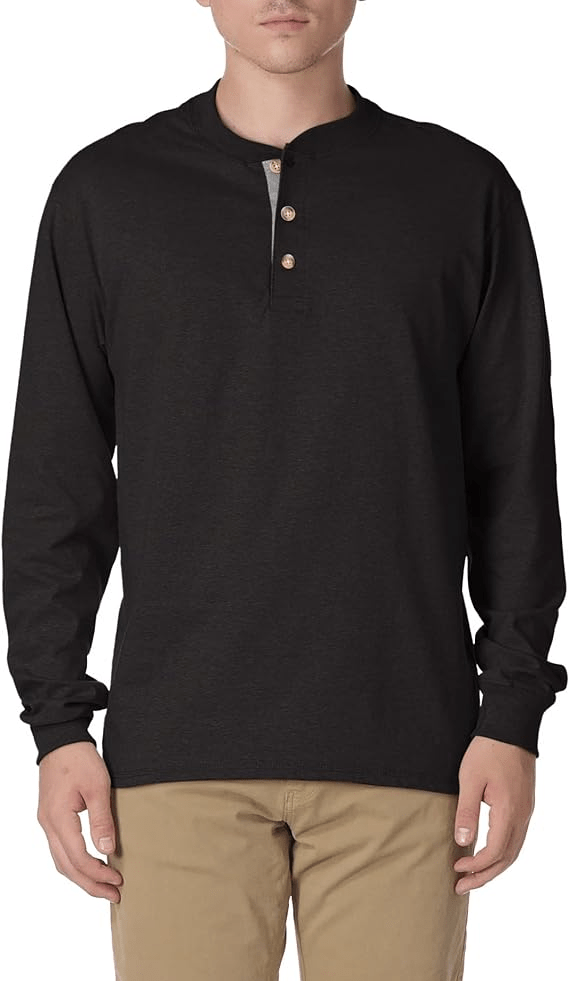


+ Black Long-Sleeve Henley – look for one with buttons at the top, you’ll need 3 of these!
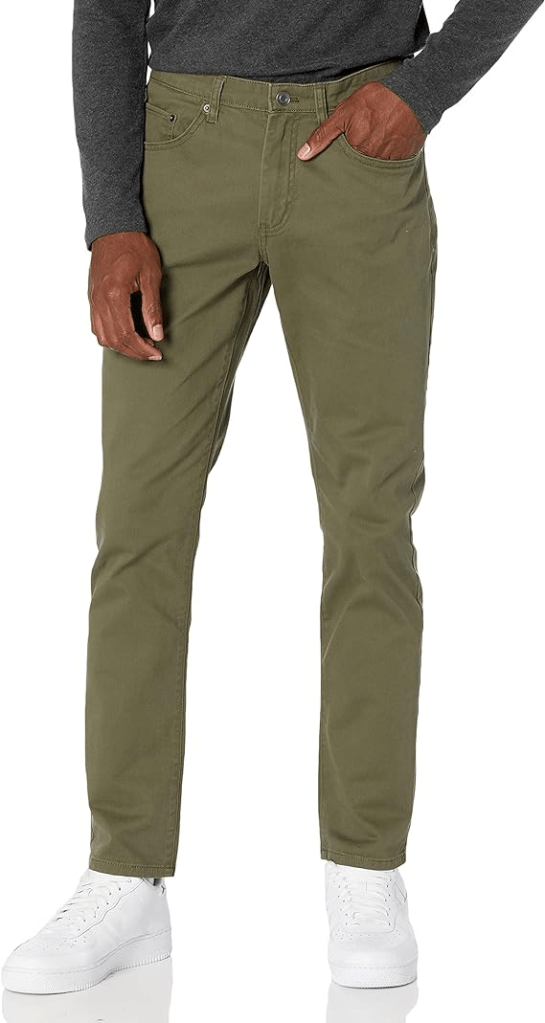
+ Olive Green Pants/Jeans – MP already had a pair, linking a similar pair
+ Dusty Orange Long Socks – very pleased with the color match on these! make sure to leave the big-toe indent in your socks from the flipflops so your socks look like tabi socks! (sold out, here’s another option)
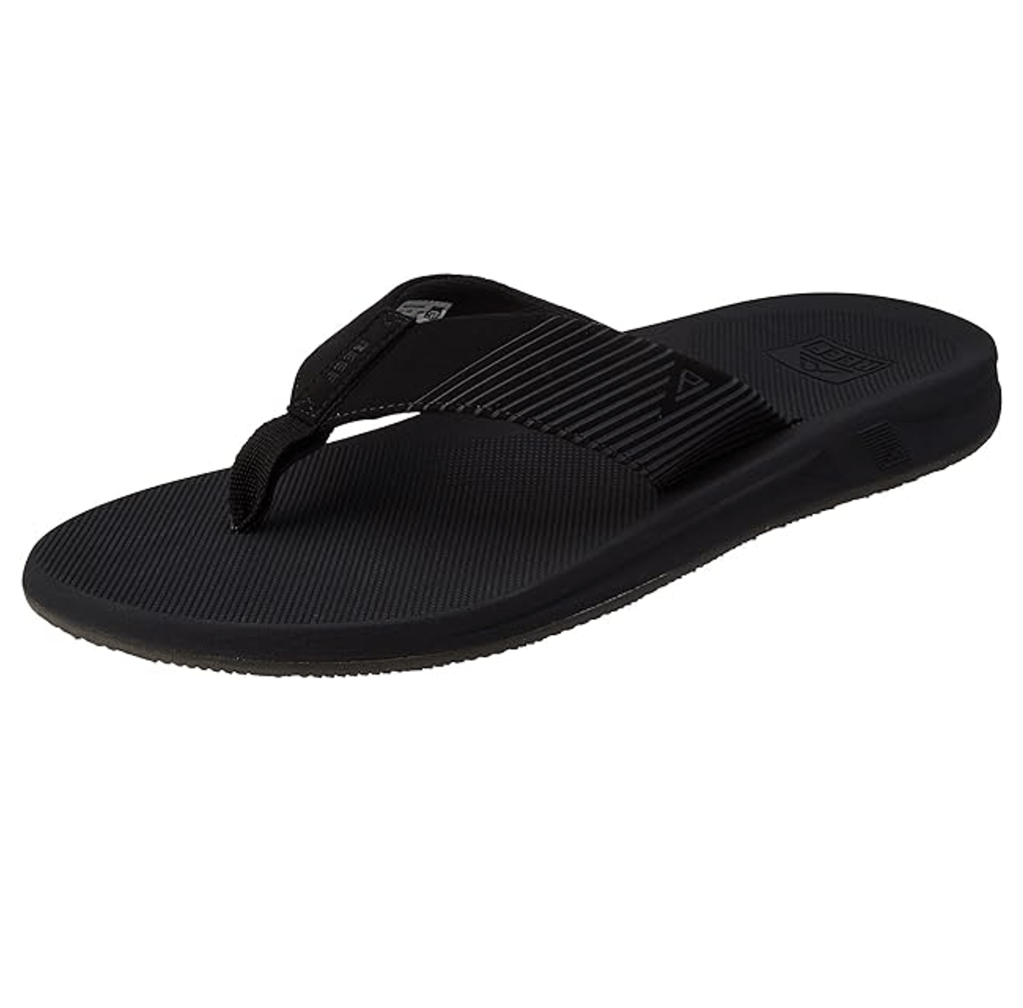
+ Black Thong Sandals – MPs are from Costco, linking a similar pair
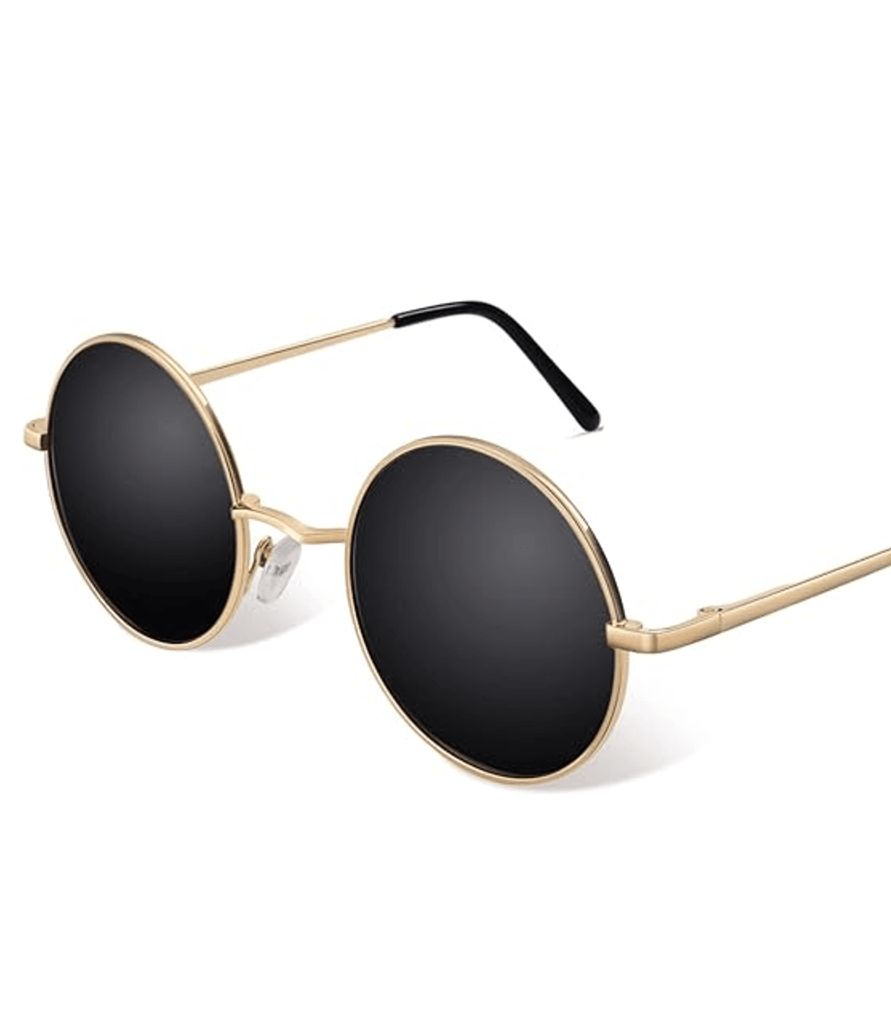
+ Circle Sunglasses – rimmed lennon glasses, that are preferably narrow
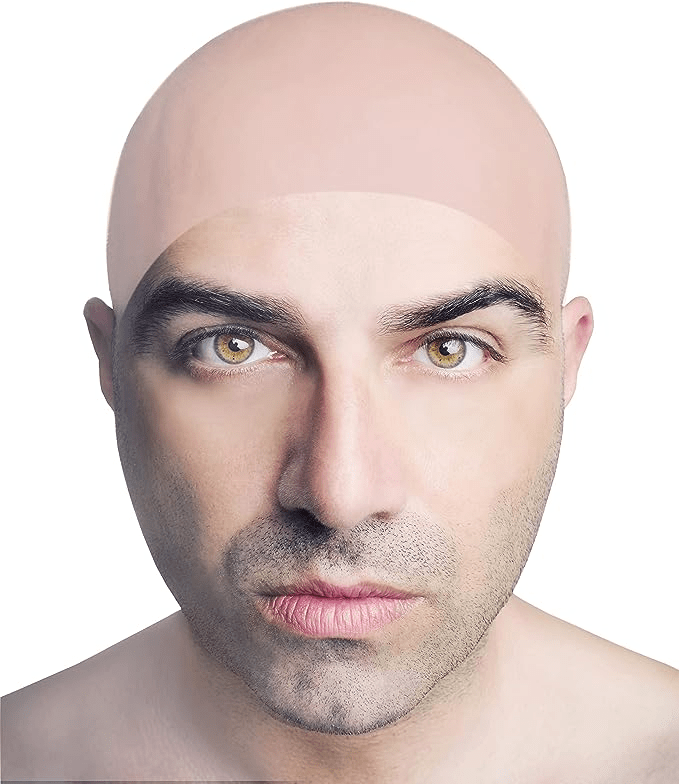
+ Bald Cap – the one I got is sold out, so here’s another option! (getting 2 isn’t a bad idea in case you mess up lol)
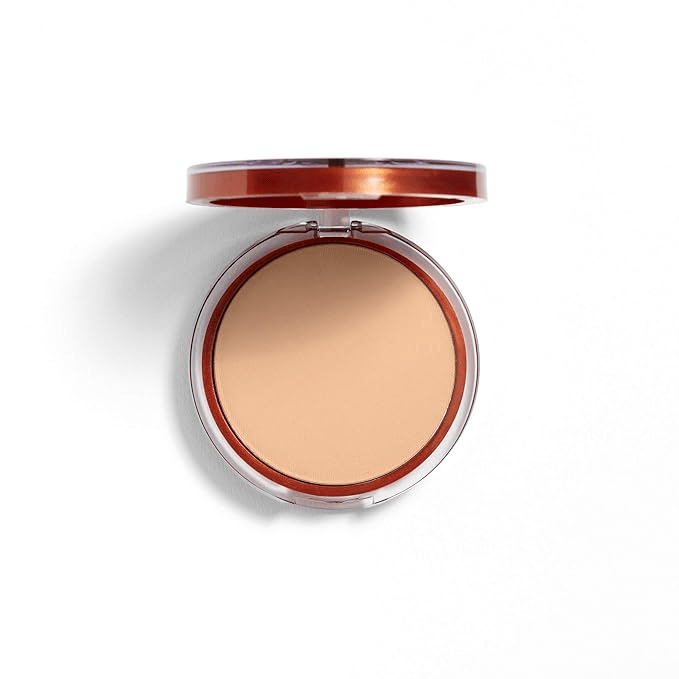
+ Foundation – a foundation to match the bald cap to the color of the wearer’s skin
+ Powder – to mattify the foundation and to make sure it doesn’t slip off the bald cap
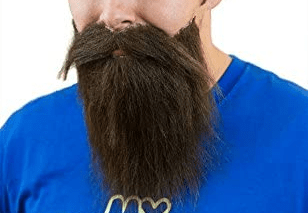
+ Mustache – this was perfect for what I needed! Trim, stack, and adjust the mustache/beard to recreate Kamaji’s wide and wilde stache~
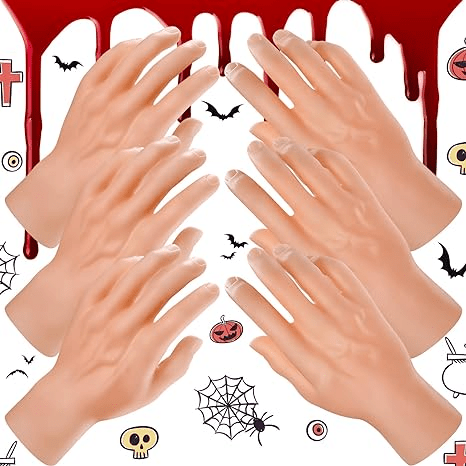
+ Fake Hands – you’ll need 4
+ Black Claw Nails – we also got these nails, but opted to not wear them
+ Paper Towel rolls – my dad had some thicker rolls that I used instead, but paper towel rolls will work too
+ Rope – used the same one from Rin’s costume!
+ Jewelry String – fishing string also works
+ Needling Thread – to work with the jewelry / fishing string
+ Heavy duty scissors or a blade to cut into the hands
+ Tape – preferably clear packaging tape
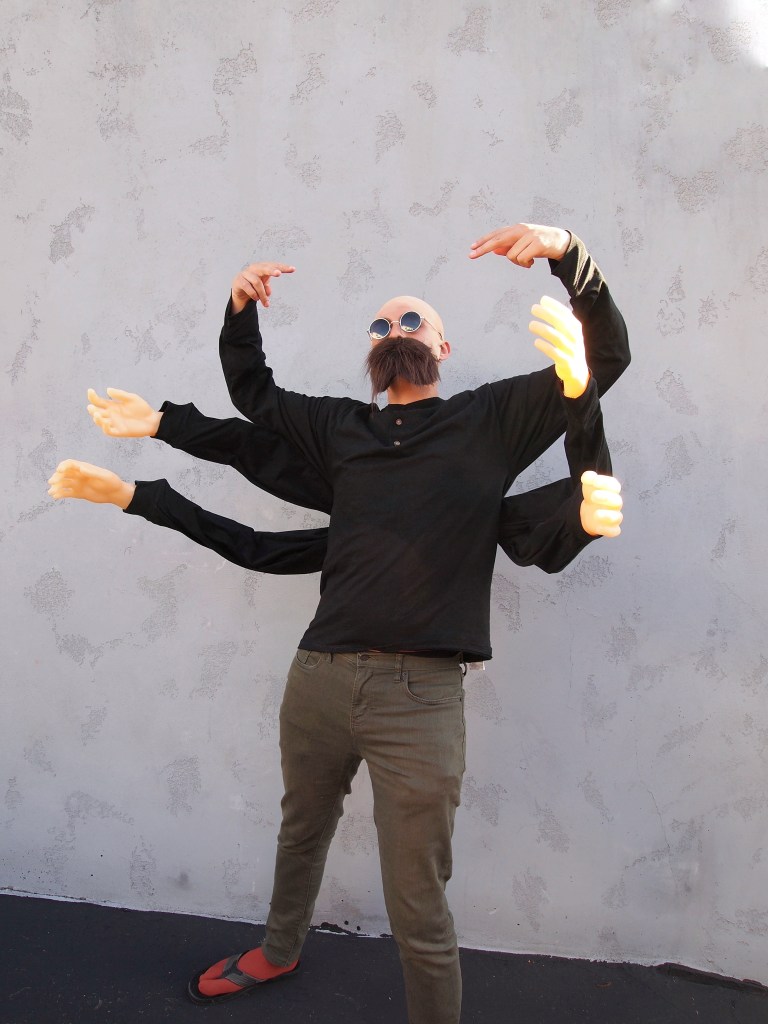
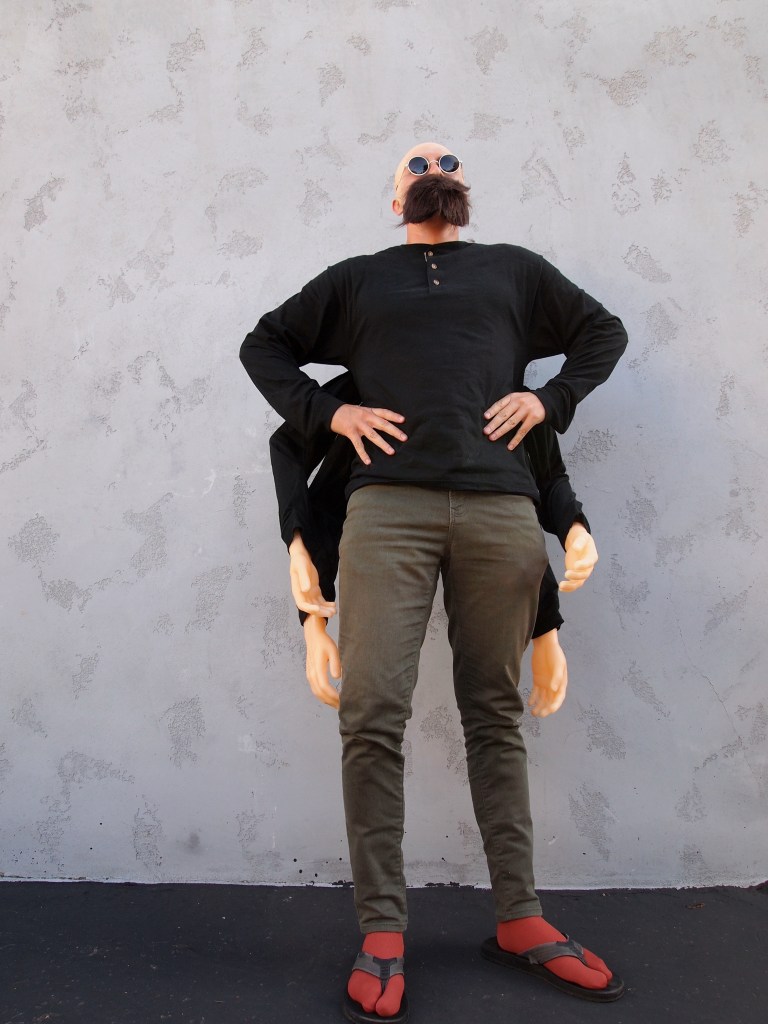
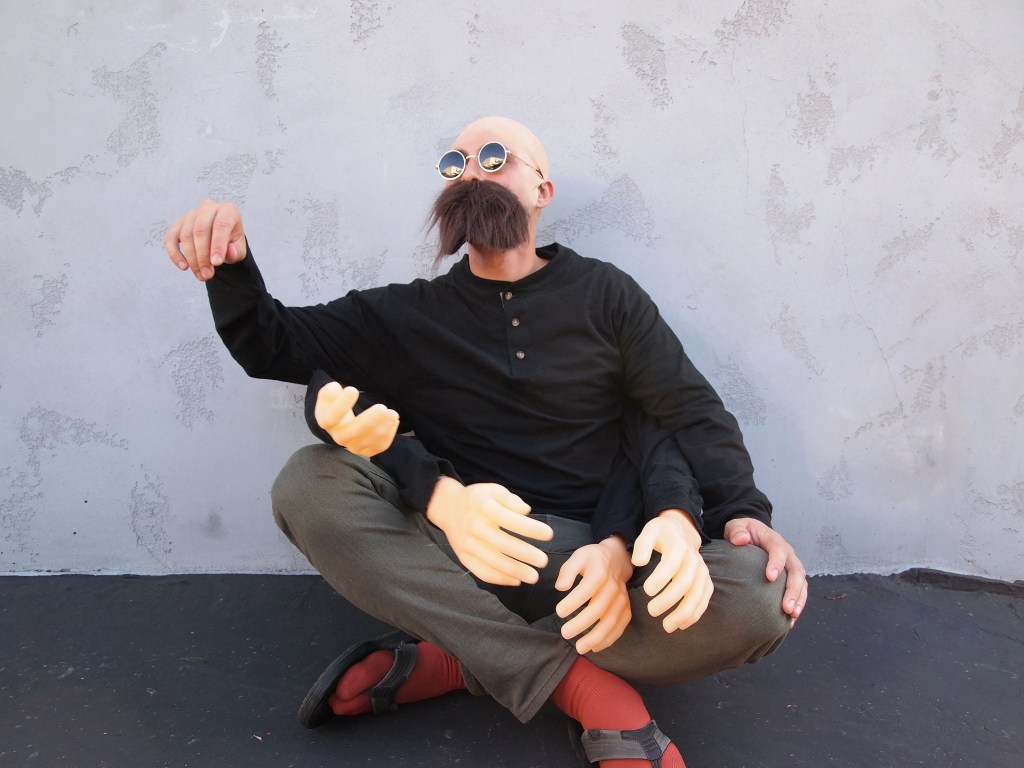
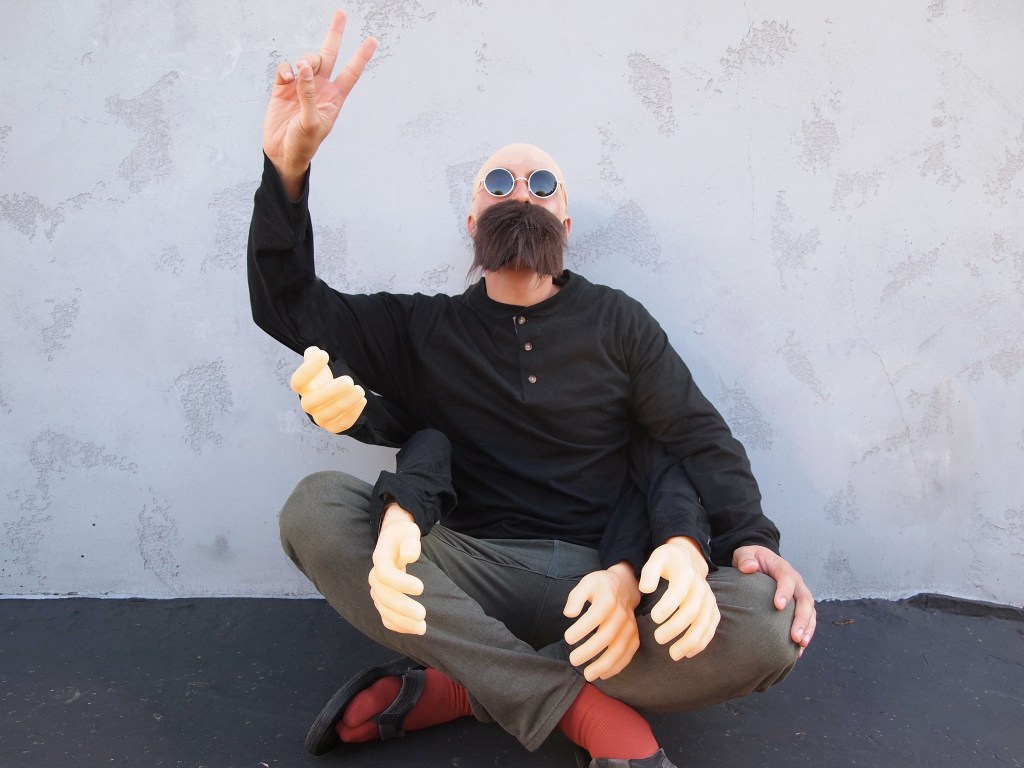
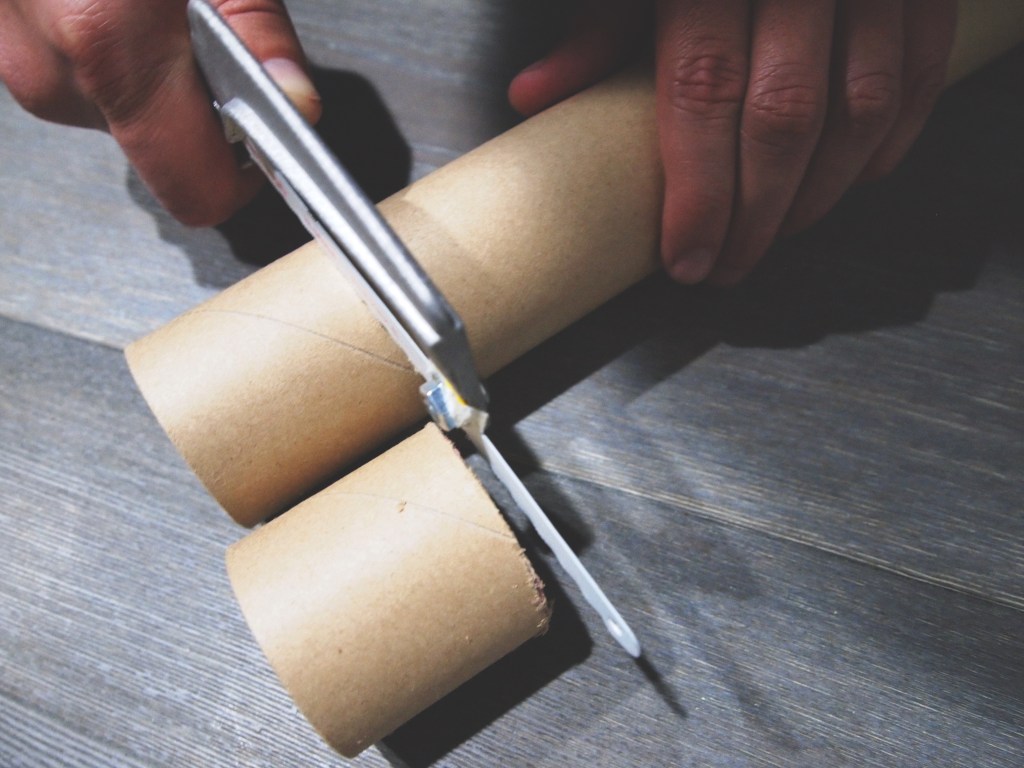
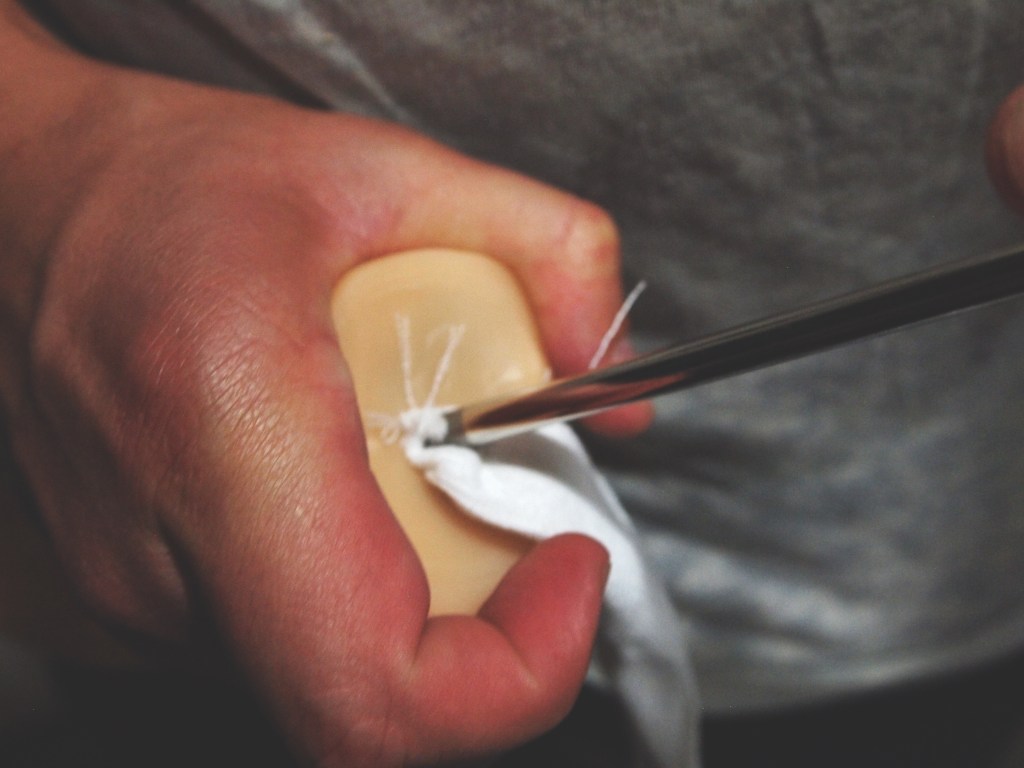
Okay, how to make the Kamaji arms!! I’m going to do my best to explain, but I think you get the idea!
- Create the limbs:
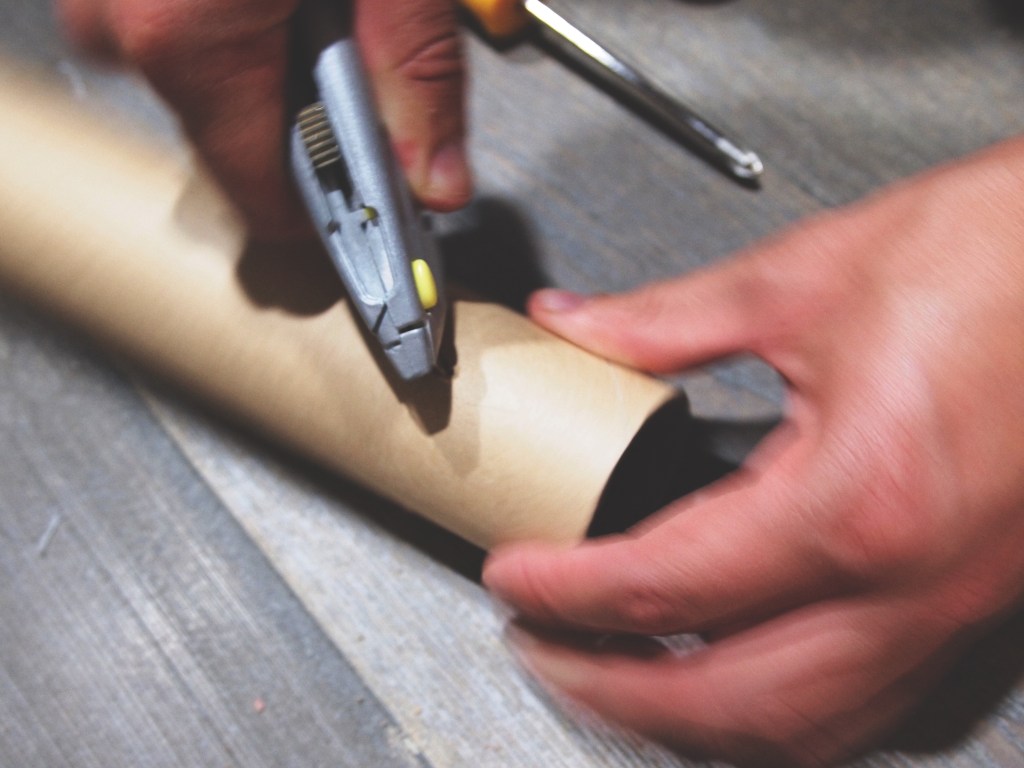
- Trim the paper towel rolls to size — you’ll need 4 upper arms, and 4 forearms
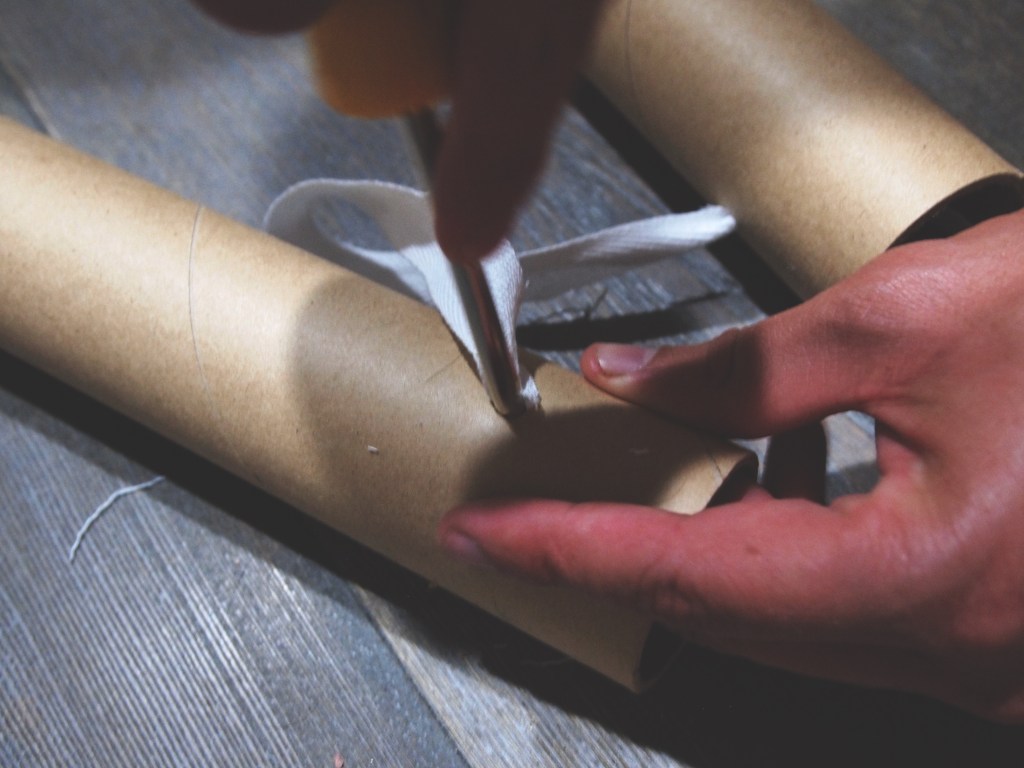
- Poke one hole on each upper arm and each forearm, about an inch or two from one end
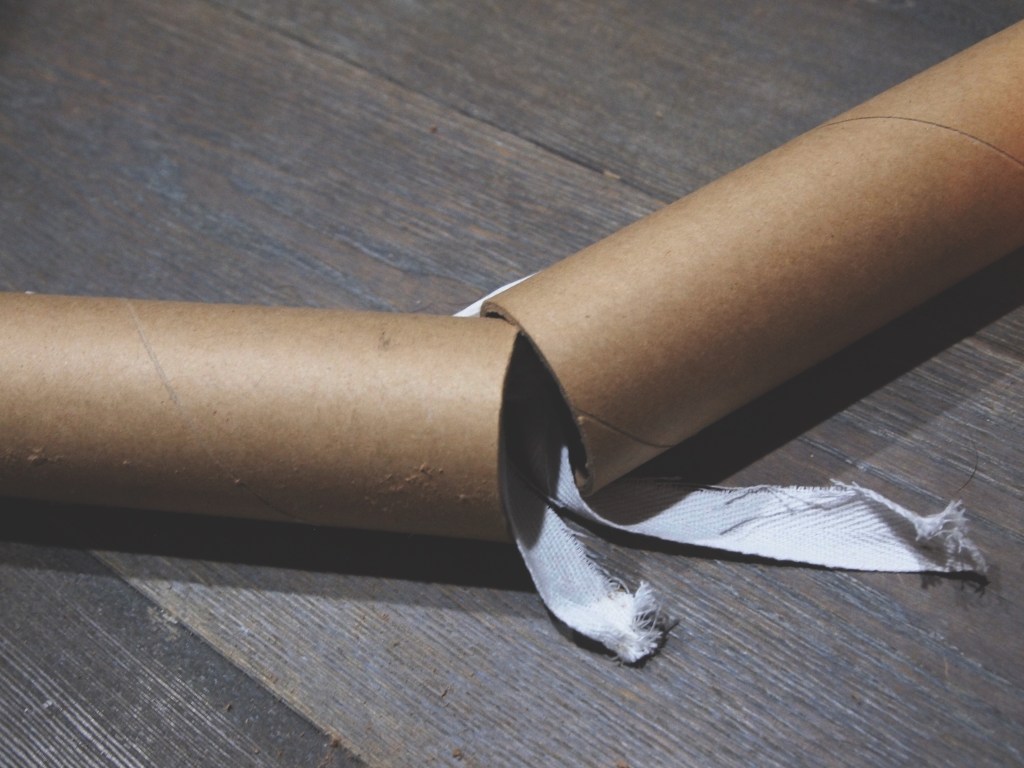
- Instead of having straight arms, make the arms appear bent. Connect one upper arm to one forearm by looping a piece of rope (a few inches) through the holes (the ends with the poked holes should be next to each other) and tying a knot which acts as the elbow. You’ll see that the tighter the knot, the more bent the arms will look. Aim for ~90-145° angles
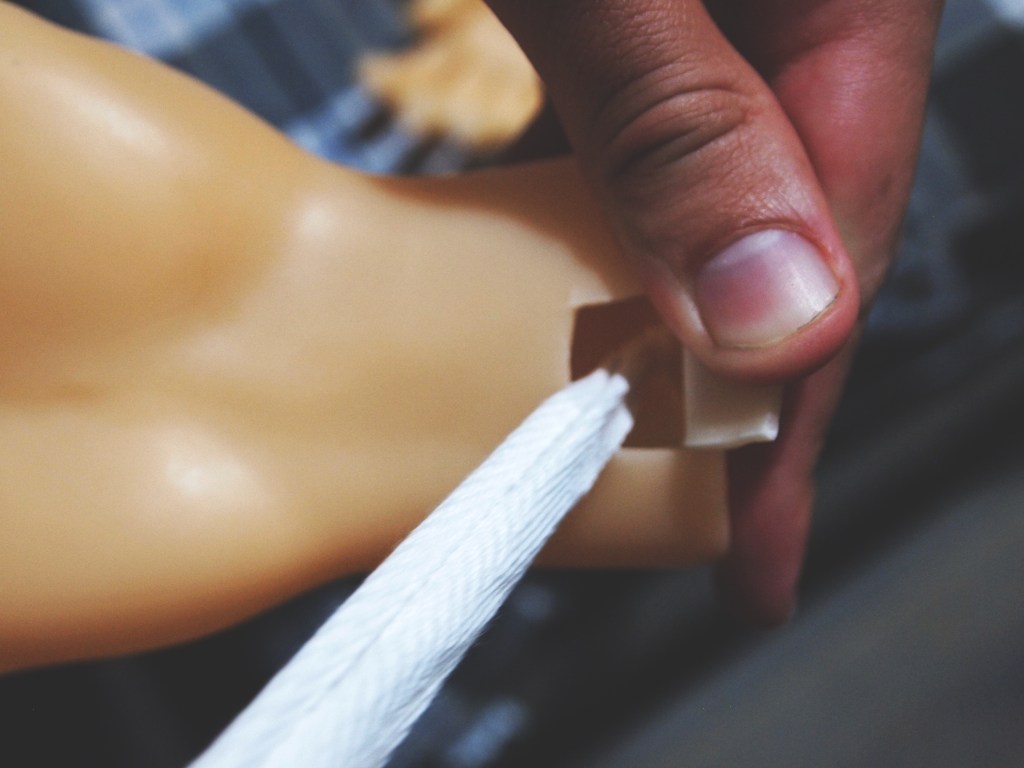
- Attach the limbs to the body:
- Cut 2 ~8-foot pieces of rope
- Slip one piece of rope through the span of the arms of one of the henleys (so through the wrist opening of the left arm, up and across the chest, down the right arm and out the right wrist opening. you should have excess rope hanging out of each wrist). Repeat with a second henley with the other piece of rope
- Take the third henleys (without rope in it) and cut two small holes underneath each armpit. This will be the “main” henley you will wear
- Grab the two left arms of the rope henleys (with the rope in it still) and slip them through the left armpit holes of the main henley. You may need to cut the hole bigger to get them through. Repeat with the right arms into the right armpit holes
- Slide these paper towel arms onto the ropes and inside the respective sleeves
- For the faux arm henleys, you’ll have excess t-shirt body that you can either cut off or just fold and bunch under the main henley
- Attach the fake hands:
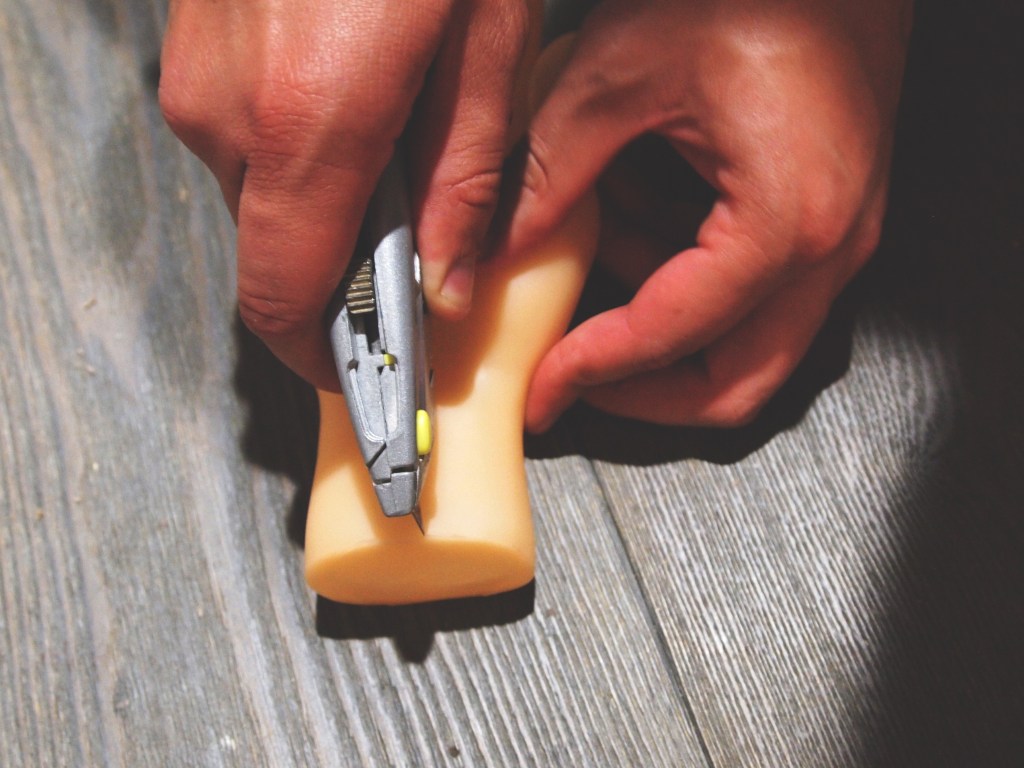
- For each fake hand, poke a hole into the base (like where the forearm bone would be) and cut a flap (like a doggie door) on each under wrist (like where your veins would be)
- For each arm, insert the rope that is hanging out of the sleeve through the base hole of a fake hand and then reach through the opening flap to tie a knot at the end of the rope so that the fake hand won’t slip off the rope
- Wrap tape around the wrist of the fake arm and paper towels to keep the wrists stiff so you don’t have “broken wrists”
- Make the arms move:
- Now the secret sauce is to make the fake limbs look like they move on their own. To do this, attach them like puppets to your real arms!
- Use the threading needle and jewelry string to connect the henleys of the top/main arms to the middle arms at about 6-12 inches distance. Secure at two points to make sure the string doesn’t break from too much weight
- Repeat the above step to then connect the henleys of the middle arms to the bottom arms
- Attach the fake finger nails
And then here are some behind-the-scenes pictures of the making! (Click through the slideshow to see the pics!)

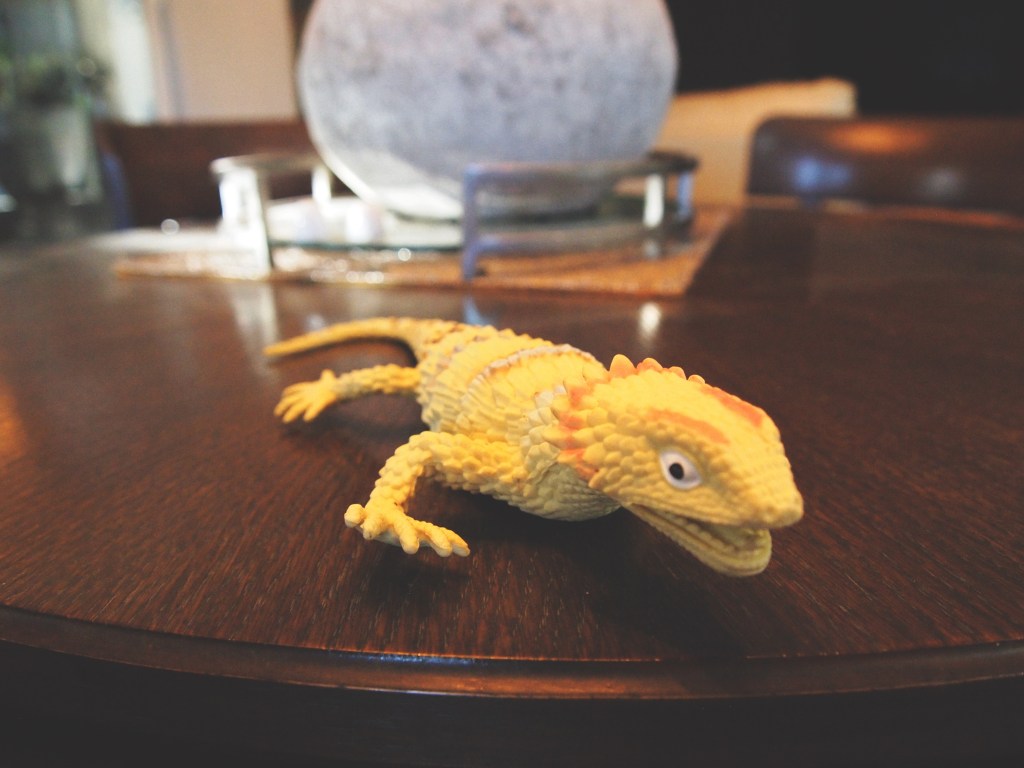
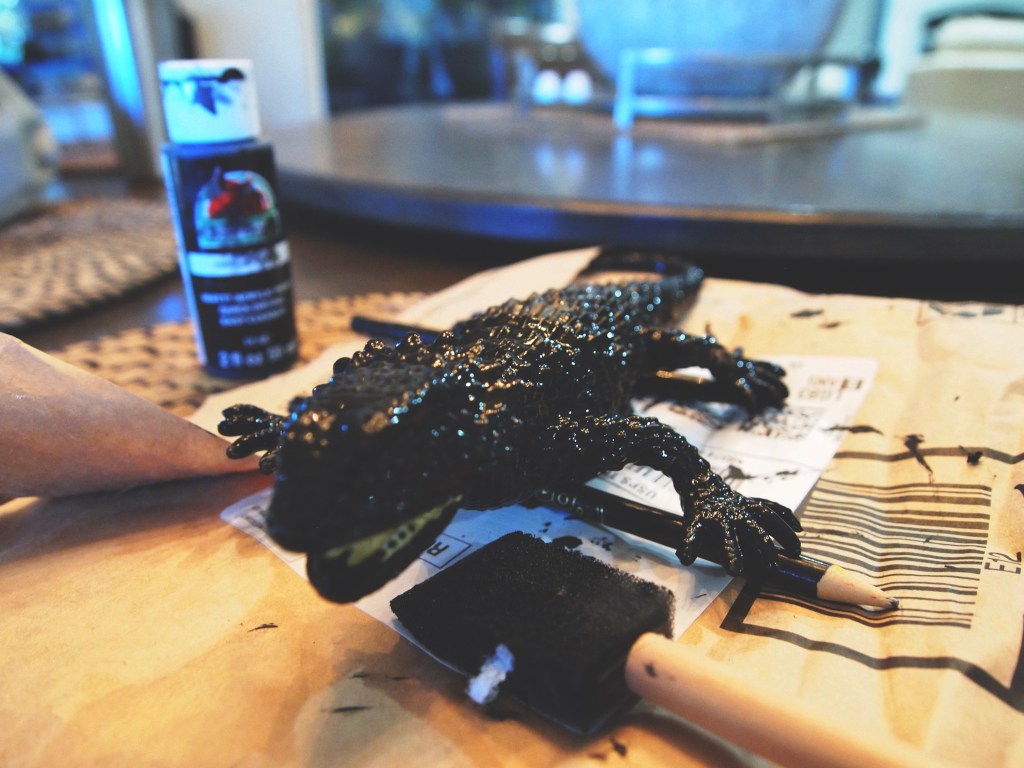
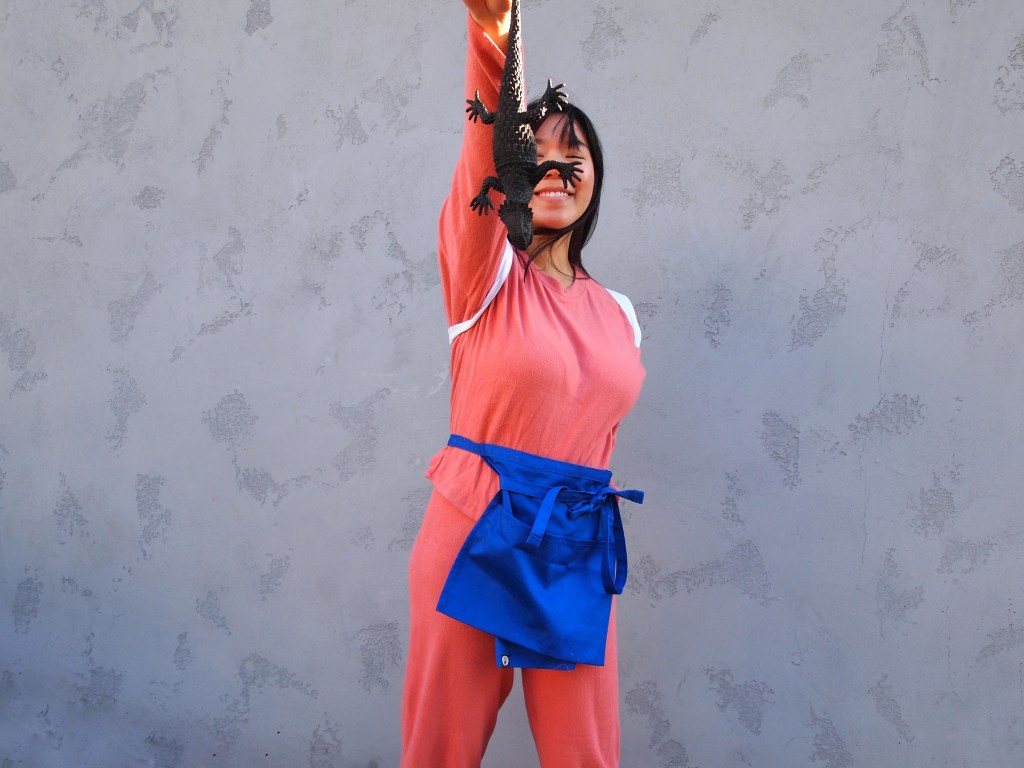
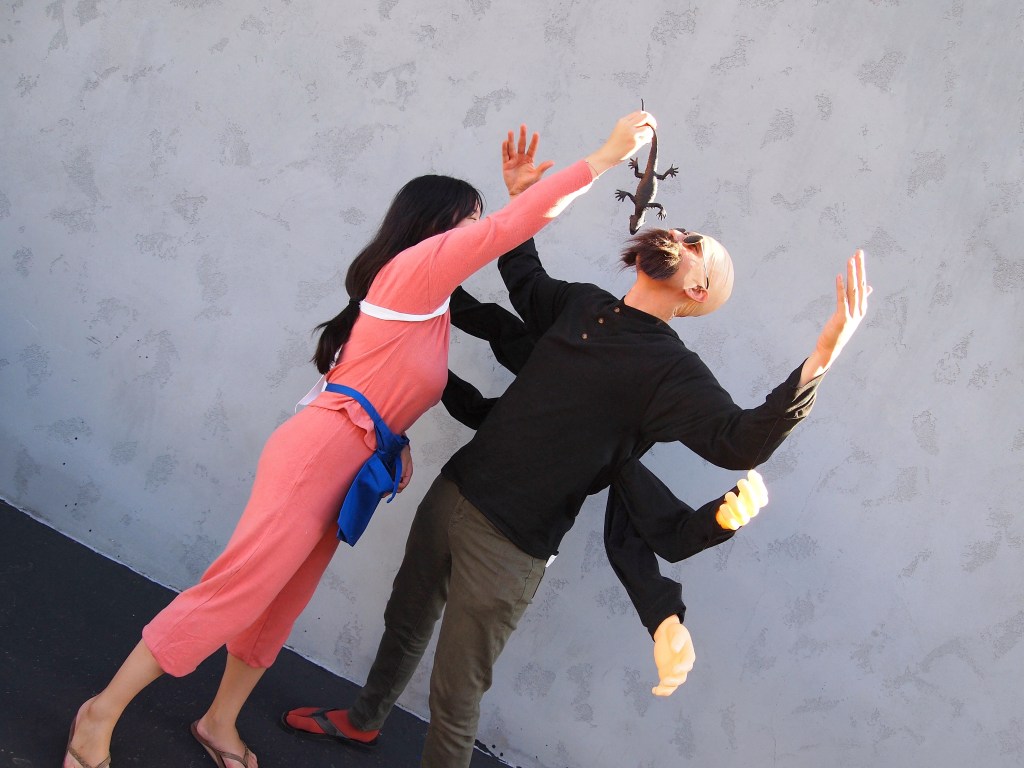
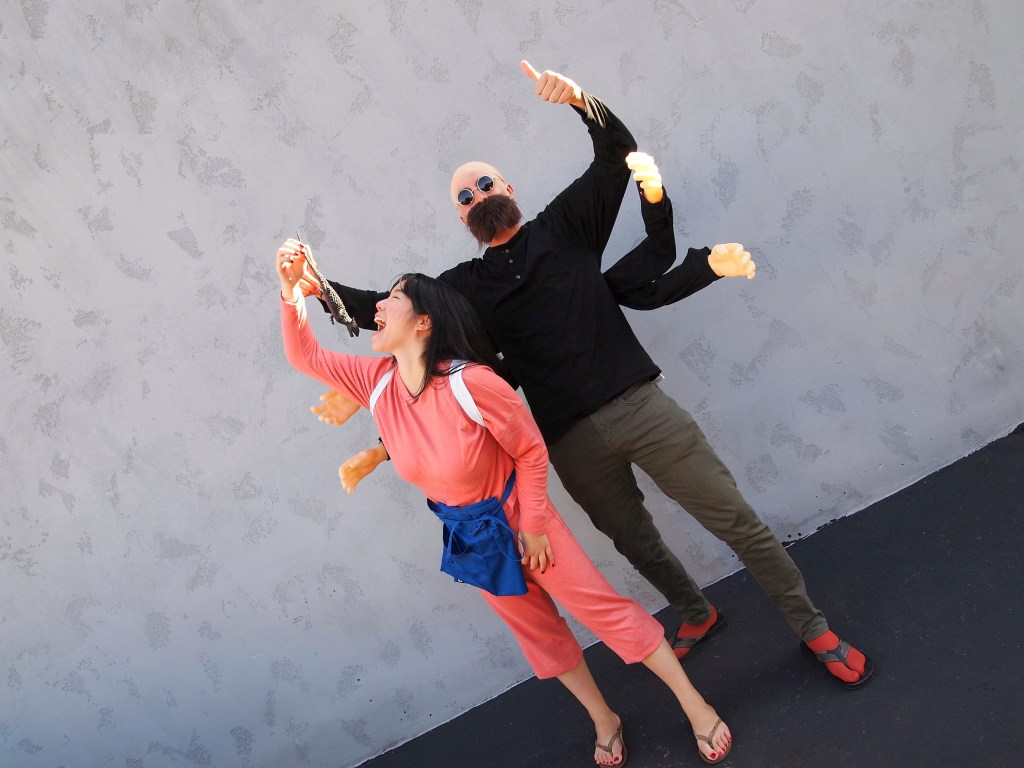
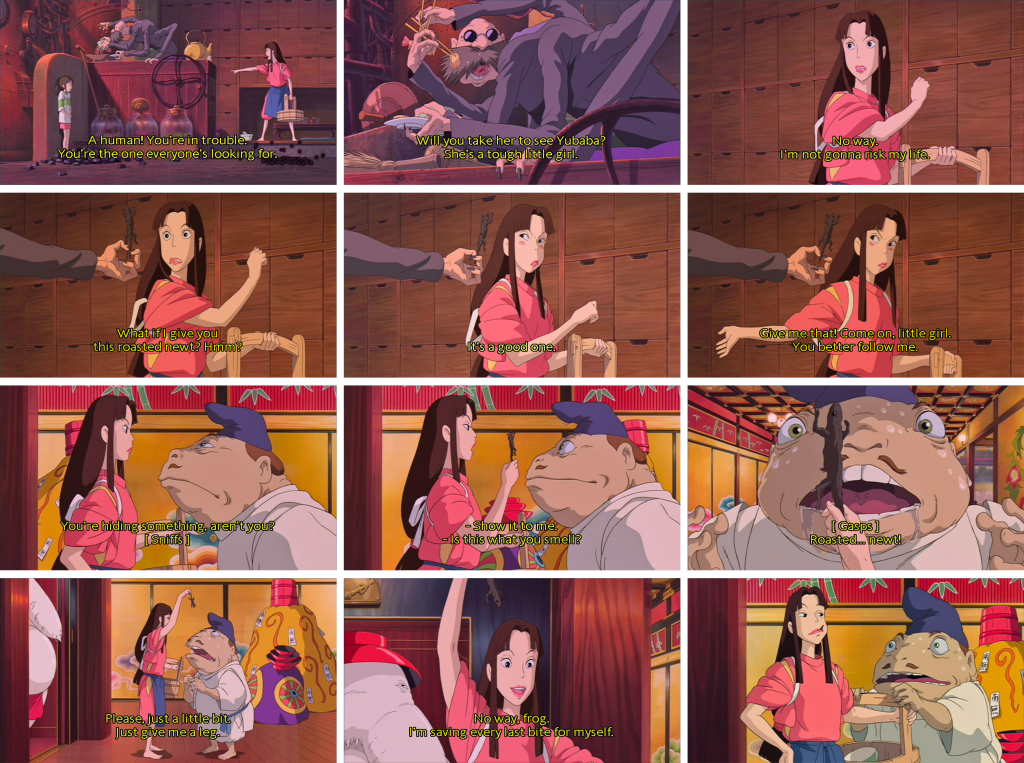
Prop: Roasted Newt

+ Fake Lizard – some sort of fake reptile/amphibian, just make sure it’s big enough! mine is sold out, here’s another option
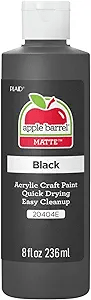
+ Black Paint – I just used some that MP had laying around, linking a similar option
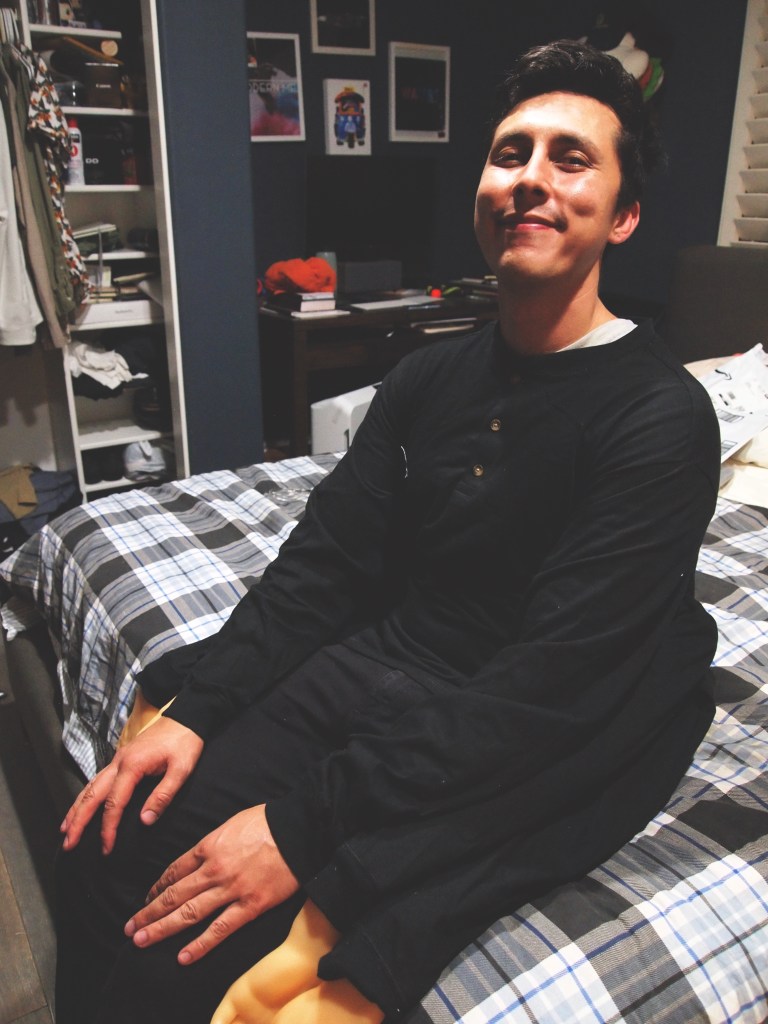
So, what do you think??? TBH, I am pretty impressed with myself! We had so much fun with this costume last year, and it was definitely worth the effort.
Well I hope you guys enjoyed this blog post!! Because now we have this ridiculous paper towel roll costume shoved into Michael’s closet LOL. Will we ever rewear it? x)
We are so blessed to be able to have these experiences and make these memories — I’ll never forget “that one year we dressed up as Rin and Kamaji!” This is what the holidays are all about, and with that, I wish you all a belated Happy Halloween and Thanksgiving, cheers to the end of year Christmas and New Year madness!!!
Xo,
Rin + Kamaji~

Leave a comment